Tue 9/26/06
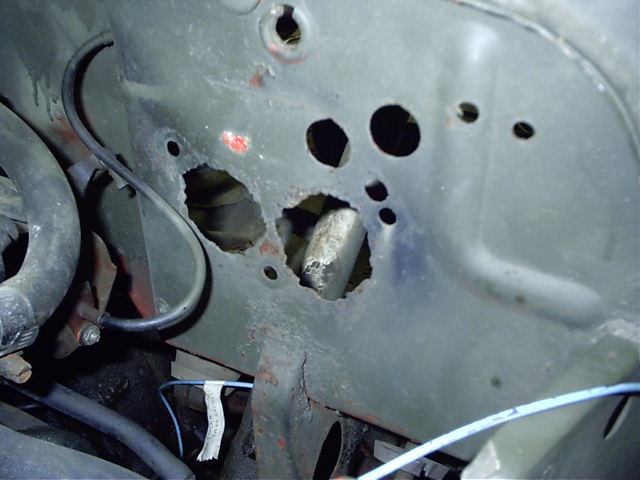
Due to space constraints on the front of the vehicle (and also for esthetic reasons), I decided to mount the control box inside the cab, above and to the left of the pedals on the driver's side. This is a view of the firewall from the engine bay side. As you can see there are a few large holes there already, and I am going to use one of the larger ones to run the winch cables through.
001 - 68 KB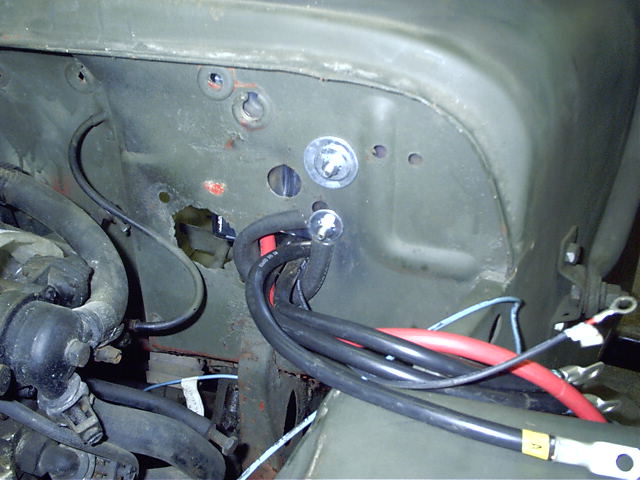
Tue 9/26/06
I cut a piece of vacuum tubing to make a grommet of sorts so the sheet metal wouldn't cut into the cables, mounted the box on the firewall, and ran the cables through.
002 - 78 KB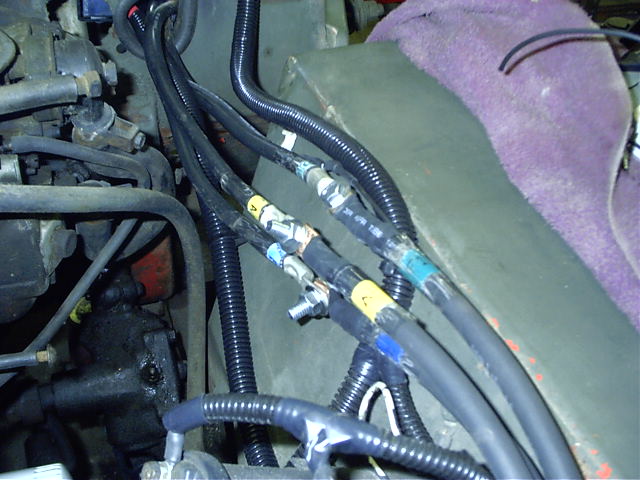
Tue 9/26/06
Since the control box is made to mount on the winch itself, I need to extend the cables. I did so by crimping and soldering #2 cable lugs onto lengths of #2 welding cable, which I ran up to the winch. Here is a shot showing the connection of the cables coming from the control box to the welding cables. As you can see, I have color coded and marked the extension cables the same as the winch cables so that hookup will be easy if it ever needs to come apart. After these connections were made, I wrapped each connection with a comination of split loom tubing, rubber and electrical tape.
003 - 84 KB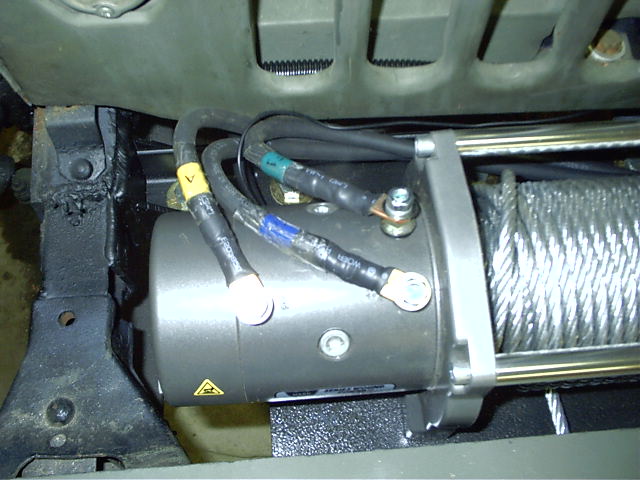
Tue 9/26/06
A picture showing the welding cable extensions attached to the winch. I may make a decorative plate or something to hide this at some point, but its fine like this for now.
(Obviously, this pic was taken after the winch mount fabrication was done, the details of which are shown below.)
004 - 82 KB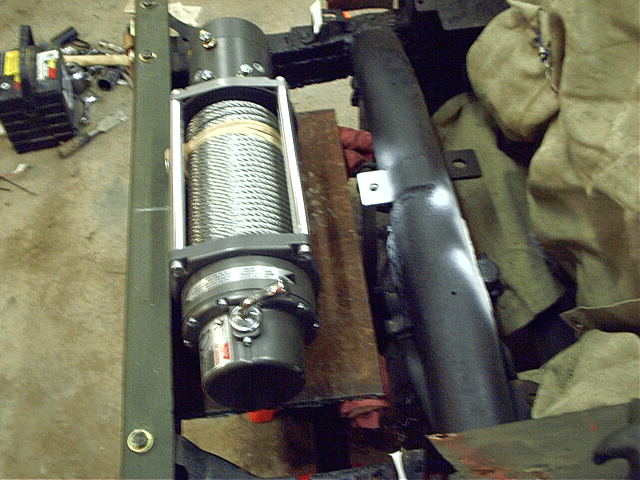
Tue 9/26/06
I scrounged up a piece of 1/4" diamondplate that I had lying around, which was just about the right size for what I wanted. My basic idea was to mount the winch to this plate, which would be mounted to the bumper in the front, and I would design a bracket to hold it in the rear. When the winch is in use, the load would be transferred to the plate and partially to the front bumper and then the frame rails, and also partially to the rear bracket which then would connect to the frame rails.
005 - 91 KB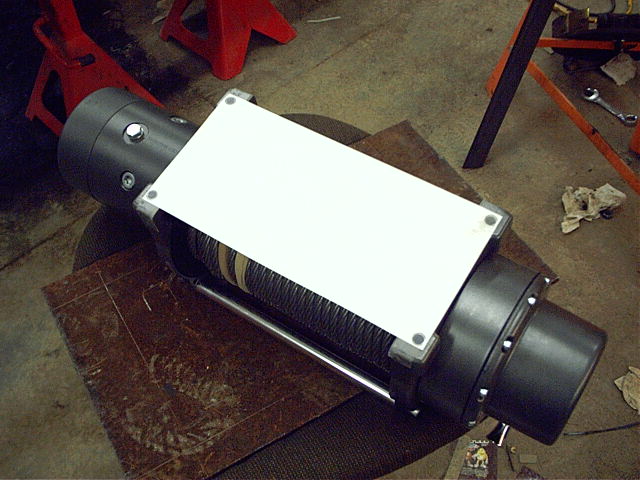
Tue 9/26/06
I taped a piece of paper to the bottom of the winch and marked the mounting holes.
006 - 84 KB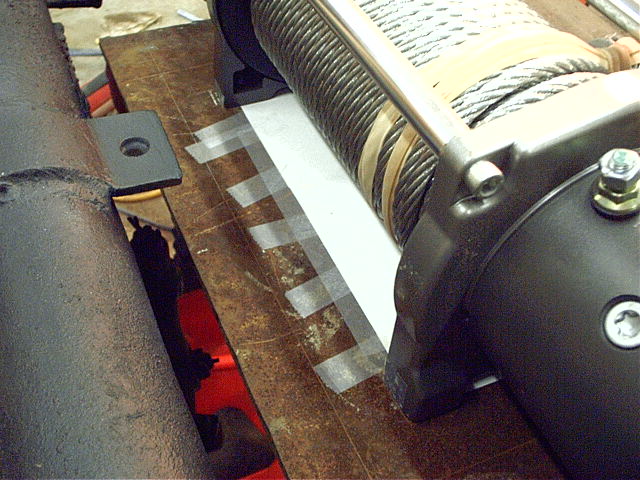
Tue 9/26/06
Then I set the winch in place on the plate, taped the paper to the plate, and carefully removed the tape from the winch.
007 - 101 KB
Tue 9/26/06
This left the paper on the plate, and I could now mark the winch mounting locations.
008 - 86 KB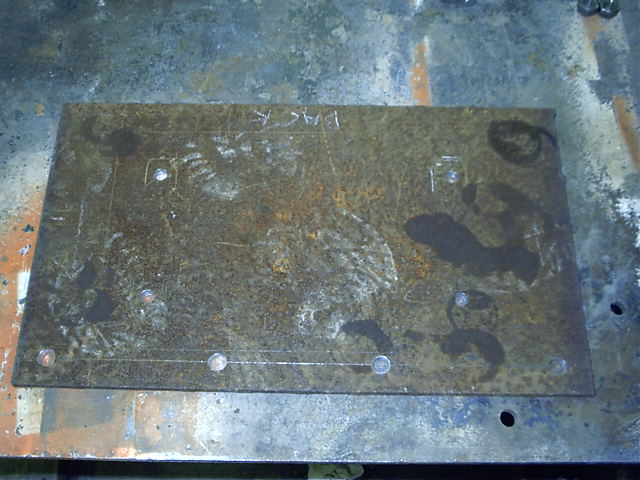
Tue 9/26/06
I drilled the four holes for the winch mounting bolts, and also drilled four large holes along the front of the plate which will be used to bolt the plate to the bumper.
009 - 90 KB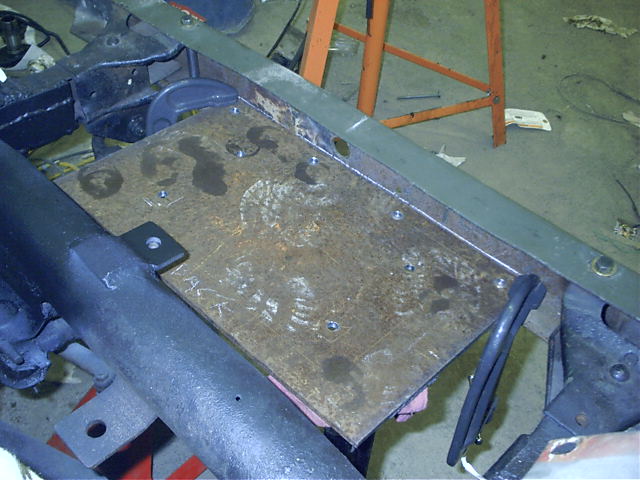
Tue 9/26/06
I set the plate in place again, and marked the bottom lip of the front bumper where the holes in the plate lined up.
010 - 86 KB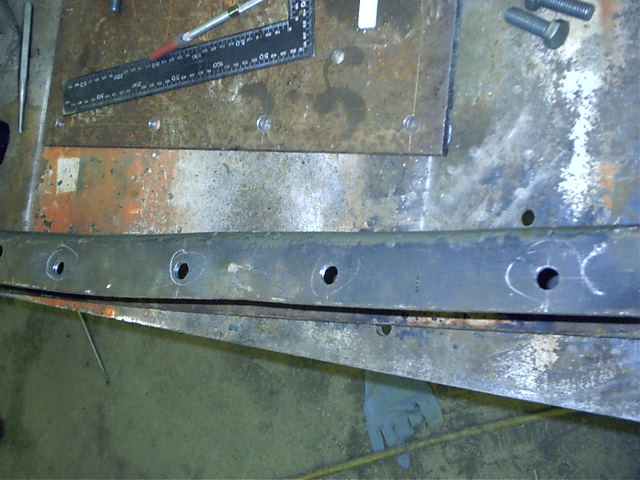
Tue 9/26/06
Then I drilled out those corresponding holes in the bumper.
011 - 84 KB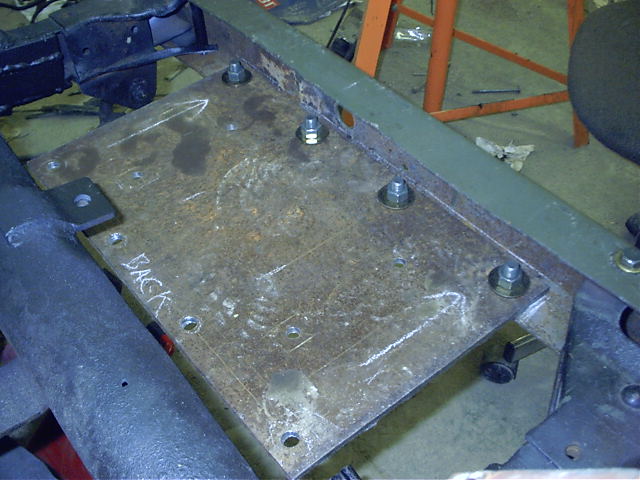
Tue 9/26/06
Finally, I could bolt the plate in place on the bumper.
012 - 84 KB
Tue 9/26/06
Using some 1/4" angle iron, I used some clamps to hold it in place, running from frame rail to frame rail, along the back of the plate. Shorter sections of the same 1/4" angle are placed against the frame rails. I had previously boxed this section of the frame for strength, and I will now use the boxed portion to mount this rear bracket.
013 - 107 KB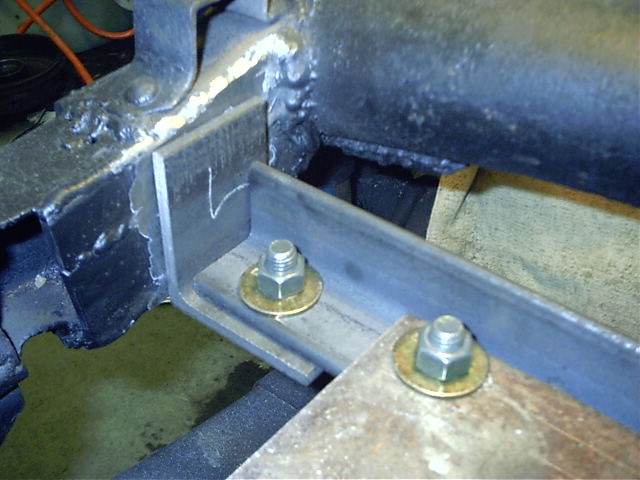
Tue 9/26/06
I have drilled holes in the back of the plate as well as the rear bracket so that I could bolt them together, and I have also drilled holes through the smaller side brackets so that the rear bracket can be bolted to it.
014 - 77 KB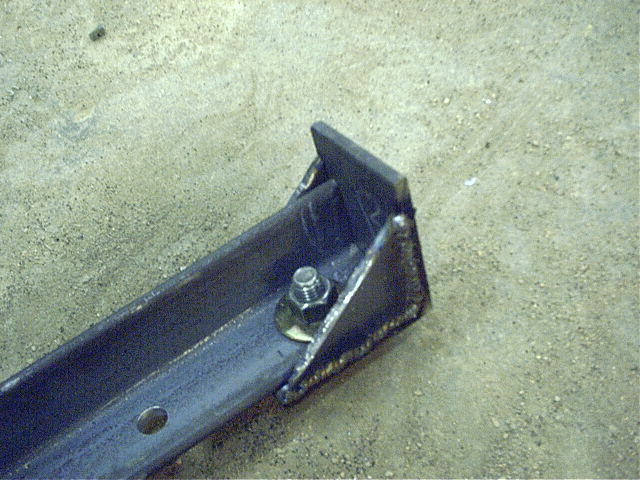
Tue 9/26/06
I made a "cup" for the rear bracket to sit in by welding a couple of gussets to each of the smaller angle pieces.
015 - 97 KB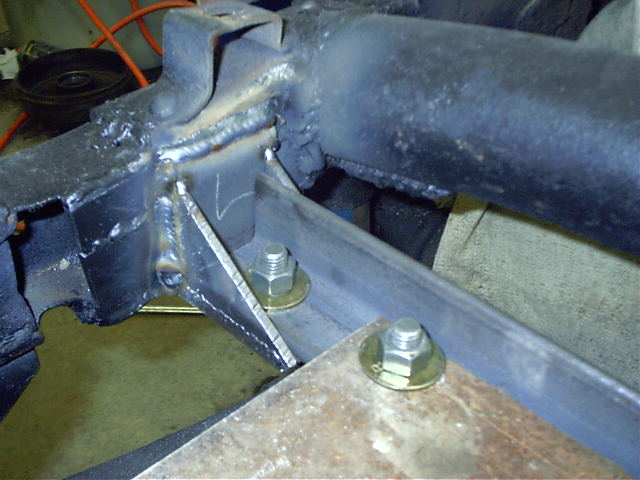
Tue 9/26/06
Now, I have welded the "cups" to the boxed portion of the frame rails.
016 - 77 KB
Tue 9/26/06
I cut a clearance hole for the cable and drilled mounting holes for the roller fairlead.
017 - 82 KB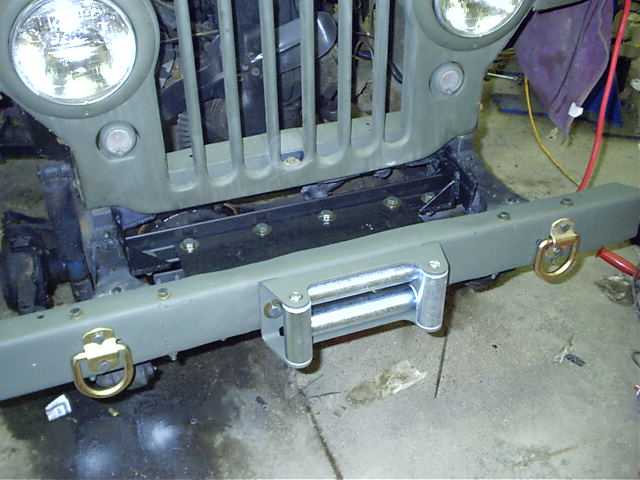
Tue 9/26/06
Here is a shot of the roller fairlead in place, and I have painted up the rest of the mounting hardware before bolting it into place, and I've painted the front bumper also.
018 - 86 KB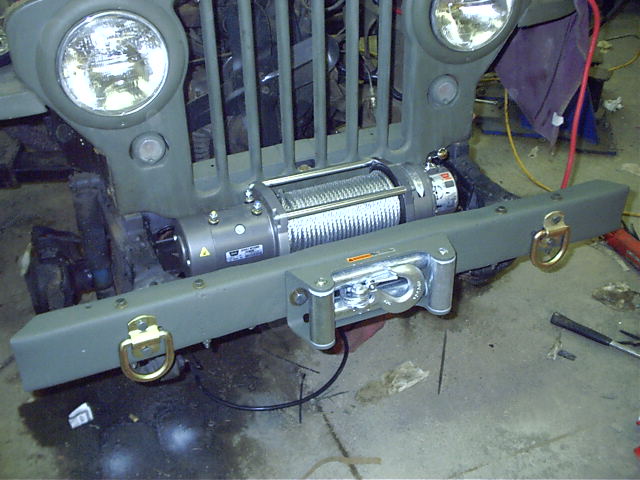
Tue 9/26/06
Finally, the winch can be bolted into place.
I have mounted D rings to the front bumper as well, to be used as tow points or anchor locations for a double line pull.
019 - 85 KB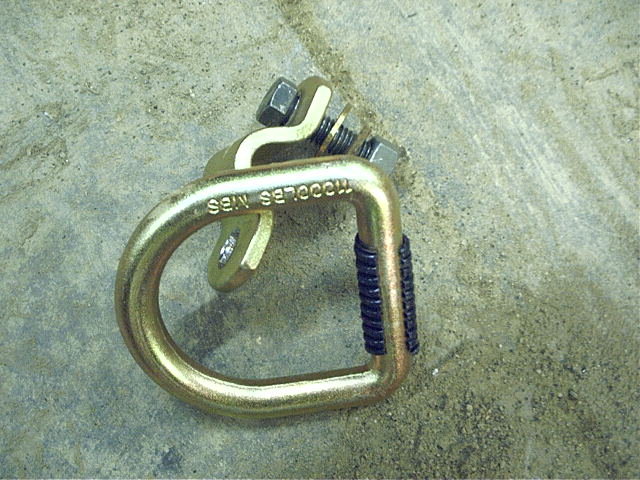
Tue 9/26/06
A quick note about the D rings... I picked these up from a local tractor supply store, and they are rated to 11,000lbs each. I enlarged the holes slightly where the bumper bolts to the frame knuckles, and mounted the rings in those locations. The bolts hold the rings to the bumper as well as the bumper to the frame.
If you just bolt the rings up, they will rattle around something fierce. To prevent this, I just cut a small section of split loom tubing and put it on the D ring prior to bolting them up.
020 - 105 KB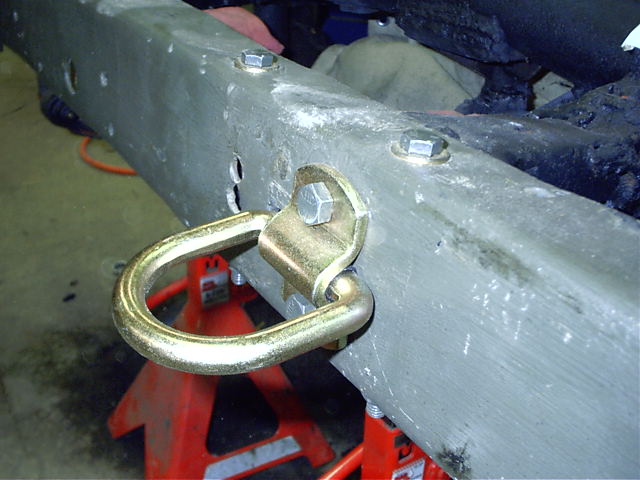
Tue 9/26/06
You can't even tell that the split loom is in there, and not only do they not rattle, but as a side bonus, you can position the rings wherever you want, and they will stay in place (as shown in the pic to the left.)
021 - 76 KB