Fri 9/8/06
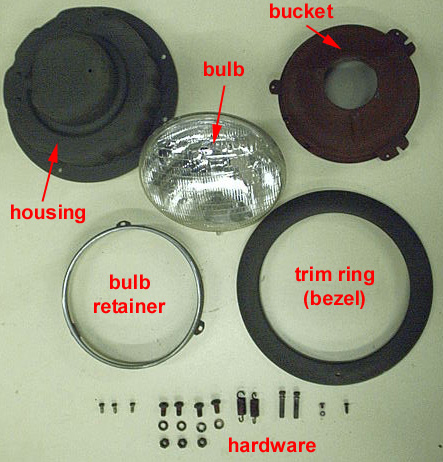
These are the components of the headlight system in the Willys CJ2A. The bulb itself is a 6014 in my Jeep because it has been converted to 12v. I am not certain what the part number for the 6v bulb is, but it is available from the usual CJ2A suppliers. (Its basically identical to the 6014, just in a 6v version.)
001 - 98 KB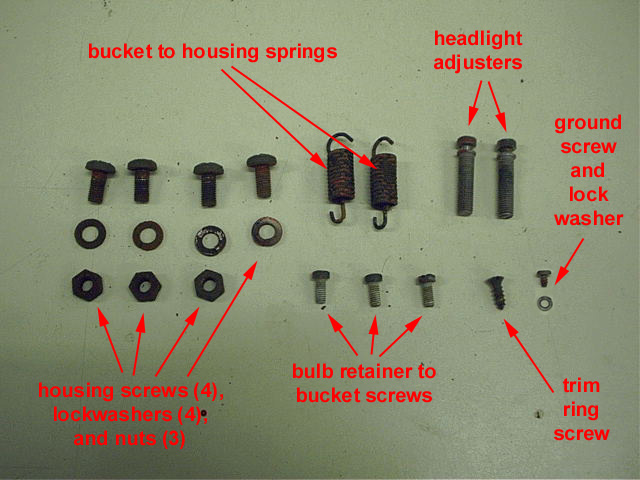
Fri 9/8/06
A close up of the hardware. Note that one of the headlight housing screws does not have a corresponding nut. This is intentional, as one of the mounting holes on the fender is threaded, due to being in a location where it would be very hard to get a wrench back there.
002 - 115 KB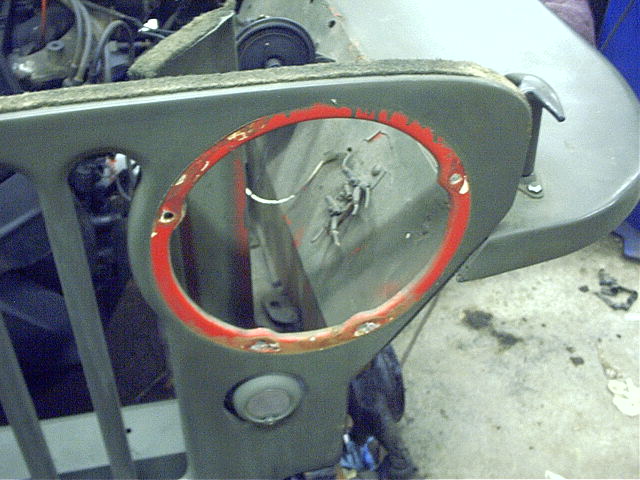
Fri 9/8/06
Here is the empty grill, ready to accept the headlight.
(Hmmm, I wonder what color my Jeep was before the previous owner painted it olive drab?)
003 - 88 KB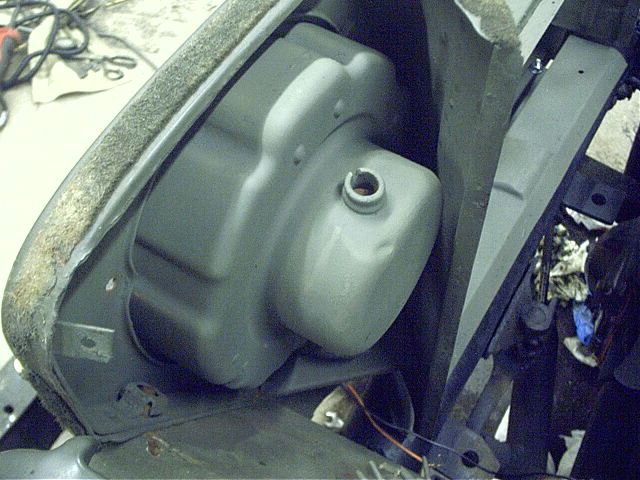
Fri 9/8/06
The headlight housing simply slides into the opening. The grommet for the wires to run out is located at the top of the housing. That's counterintuitive, I know - wouldn't you think that it should be on the bottom so that it wouldn't allow water to enter through it? Well, its not.
Maybe you are one of those people like me who can't leave well enough alone and decide to install it upside down? You will discover that the mounting holes do not line up if you do this. Without drilling new holes, this housing can only be installed one way.
004 - 94 KB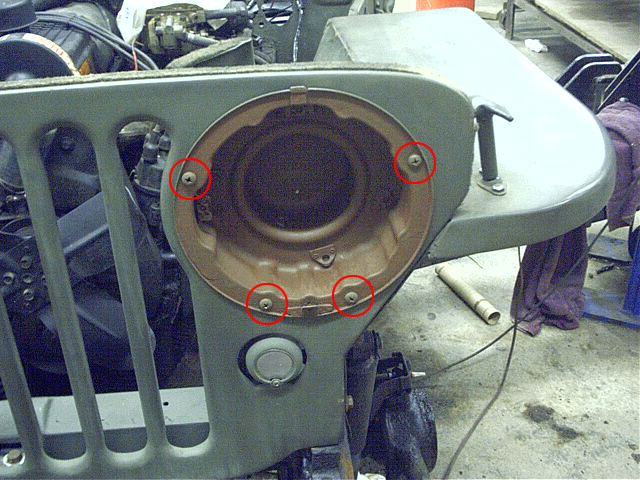
Fri 9/8/06
The locations of the housing bolts are circled in red. The one at the upper left hand corner is the one which doesn't need a nut. (If you were working on the passenger side headlight, it would be the nut in the upper right hand corner.) The lockwasher for this screw will end up on the front side of the housing rather than the back, like the other three.
005 - 151 KB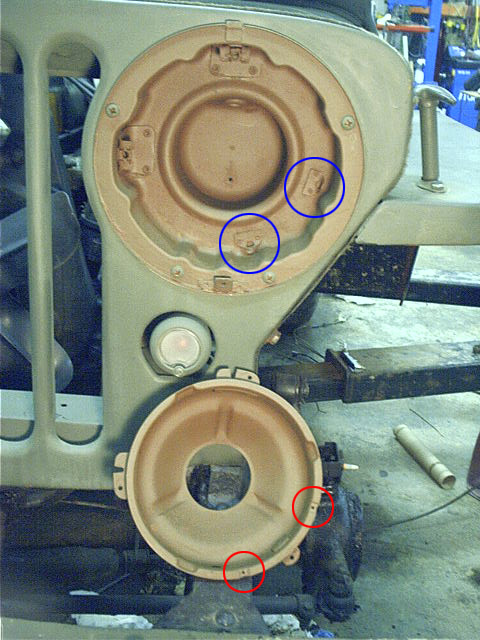
Fri 9/8/06
Next, its time to install the headlight bucket. Connect the two springs to the holes circled in red on the bucket, and attach them to the brackets inside the housing which are circled in blue.
006 - 138 KB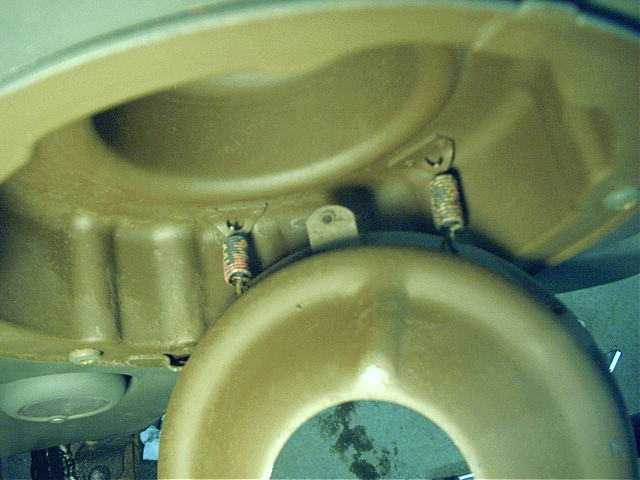
Fri 9/8/06
Like so...
I hooked the "little end" of the spring on the bucket and the larger end onto the housing.
007 - 69 KB
Fri 9/8/06
Install the headlight adjusters in the nine and twelve o'clock positions. I like to thread them in a few turns and then muscle the bucket over onto them, because if you try to hold the bucket in place as you insert the adjusters, it would be really easy to get an adjuster cockeyed and crossthread it.
008 - 81 KB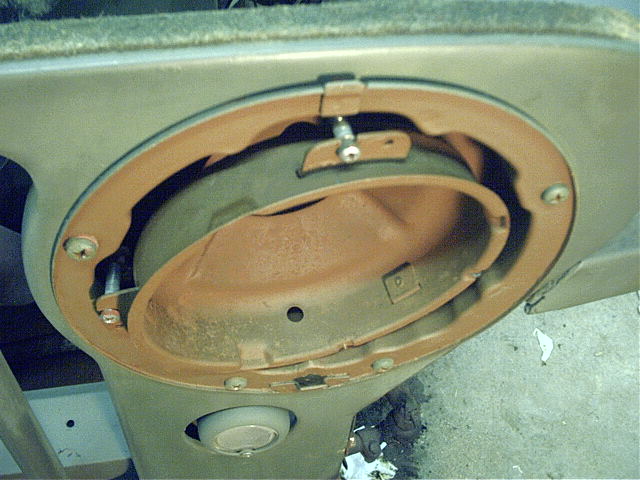
Fri 9/8/06
Just sort've push the adjusters out of the way and position the corresponding slot in the bucket under them, and seat the slot in the bucket into the the groove on the adjuster. It might be useful to have a small hammer to help tap them into position.
009 - 85 KB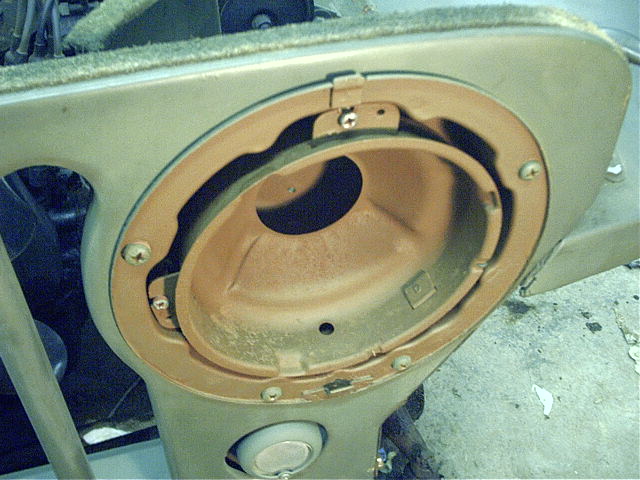
Fri 9/8/06
Once they are seated, you can screw the adjusters in until the bucket looks like it is about level, both horizontally and vertically. Obviously, screwing in the adjuster at the nine o'clock position angles the bucket to the right side of the vehicle, and screwing in the adjuster at the twelve o'clock position angles the bucket up.
010 - 90 KB
Fri 9/8/06
Now, you can thread your headlight wires and socket through the bucket and out the grommet in the top of the housing. The wires pictured here are just for demonstration purposes. I would not feel safe using these ratty old wires, and plan to replace them. (Actually, they don't look too bad in the pic, but trust me, they are.)
One of the wires has a terminal on it, which is fastened to a hole in the back of the housing. This is the ground wire. When I rewire the headlights, I will be converting them to a floating ground, so I will not be using a chassis ground in this manner. I will run a separate ground wire out with the other two wires so that I can attach it to a known good ground, and not have to worry about getting a good contact between the terminal and the body.
011 - 125 KB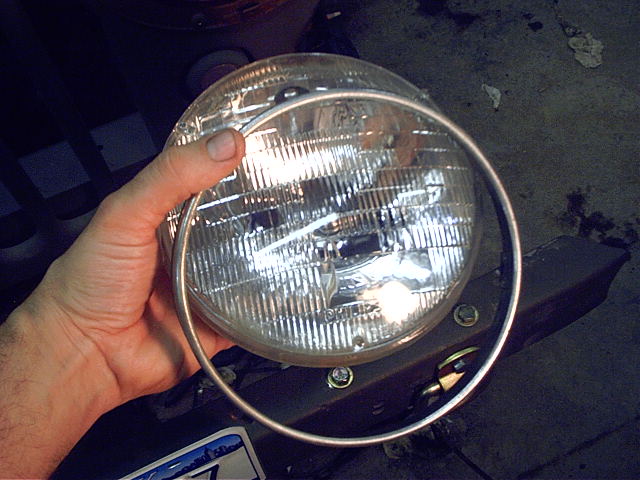
Fri 9/8/06
Next, its time to install the bulb and the bulb retaining ring. Place the ring over the bulb, like so.
012 - 87 KB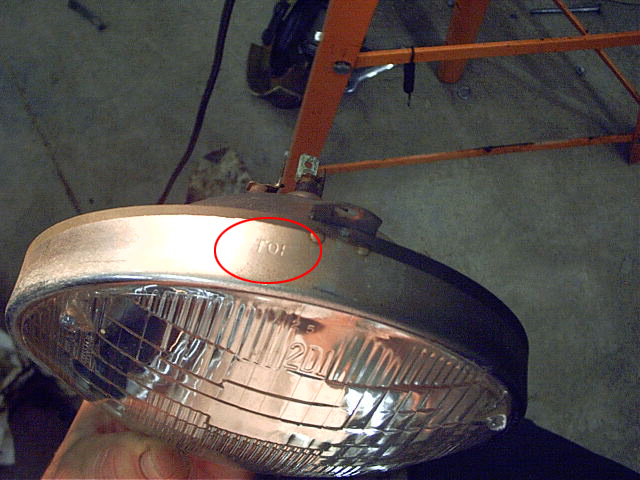
Fri 9/8/06
The ring will only go on one way, so it must be clocked correctly. The side that faces up has the word "TOP" stamped into it. If yours doesn't, just hold it up to the bucket and turn it until all three holes line up.
013 - 118 KB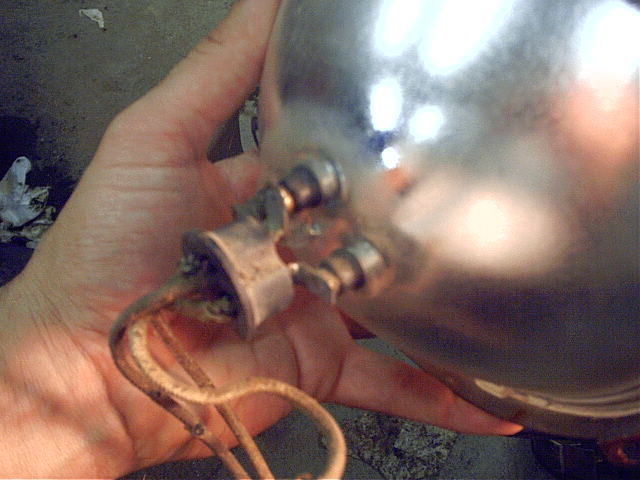
Fri 9/8/06
The headlight simply plugs into the wiring harness.
014 - 73 KB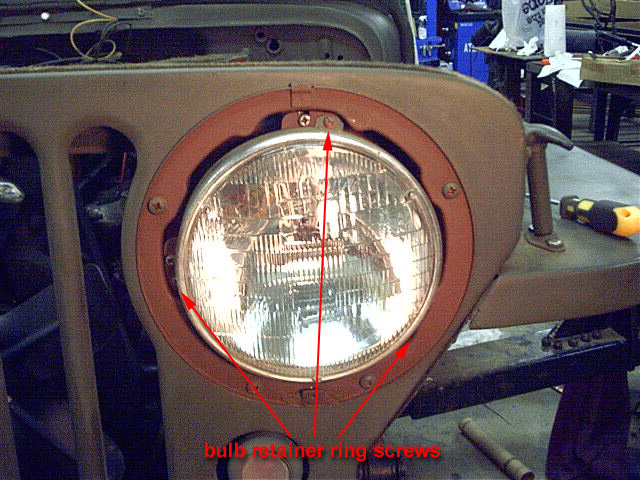
Fri 9/8/06
Then you can insert the headlight and the retaining ring into the housing, being careful to make sure the wires are pushed through the bucket and into the back of the housing, so that they won't get pinched. Three screws attach the retaining ring to the bucket. At this point, you should aim your headlights, using the adjuster screws. (Of course, your headlight wiring actually needs to be hooked up before you can do this. If you're not going to aim them right now, go ahead and install the trim ring; just make a mental note to adjust them before hitting the highway at night.
015 - 166 KB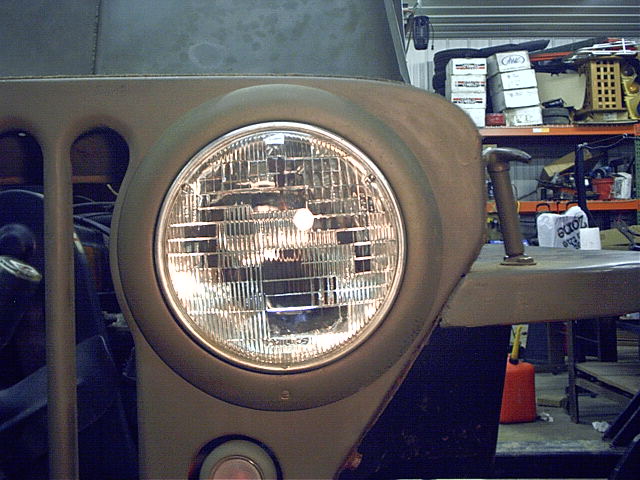
Fri 9/8/06
There is a tab at the top of the trim ring which fits over the bulb retaining ring, then a single screw at the six o'clock position holds it in position.
That's it, they're in! All that needs to be done is to connect the wires to the proper terminals on the high/low beam switch.
016 - 94 KB